
Essential Graphic Design Skills & Adobe Tools Mastery in 2026
Table of Contents
Introduction: Skills First, Software Second
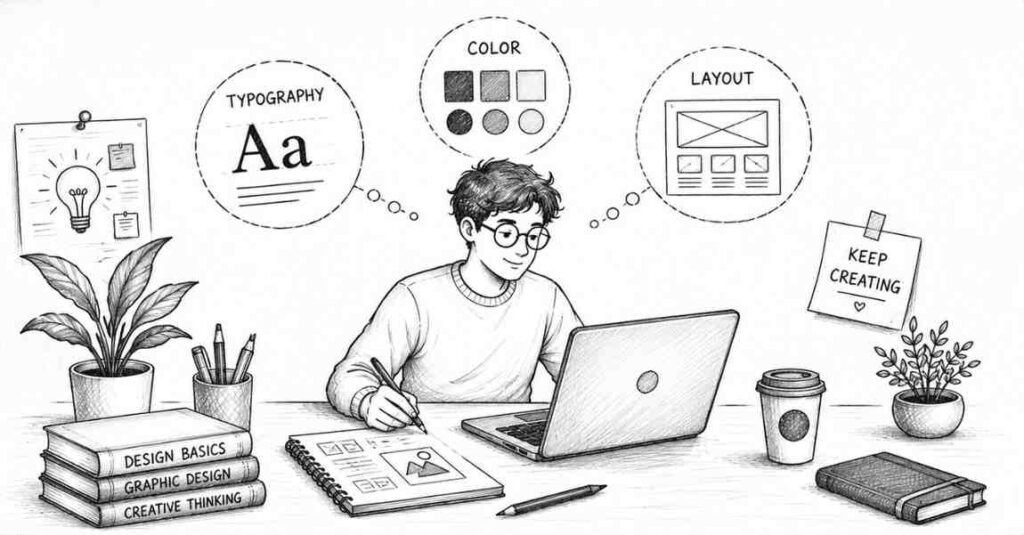
Many beginners start by asking, “Should I learn Photoshop or Illustrator first?” The truth is, tools are important, but they only become powerful in your hands when you understand core design skills. Software changes, but design fundamentals stay relevant for your entire Graphic Design career.
In this guide, we’ll break down the essential skills every aspiring graphic designer in India must build, and then map those skills to the right tools so you know exactly what to learn and why. The goal is simple: help you move from “I’m learning design” to “I can confidently take real projects.”
Core Graphic Design Skills You Can’t Skip
1. Visual Thinking and Concept Development
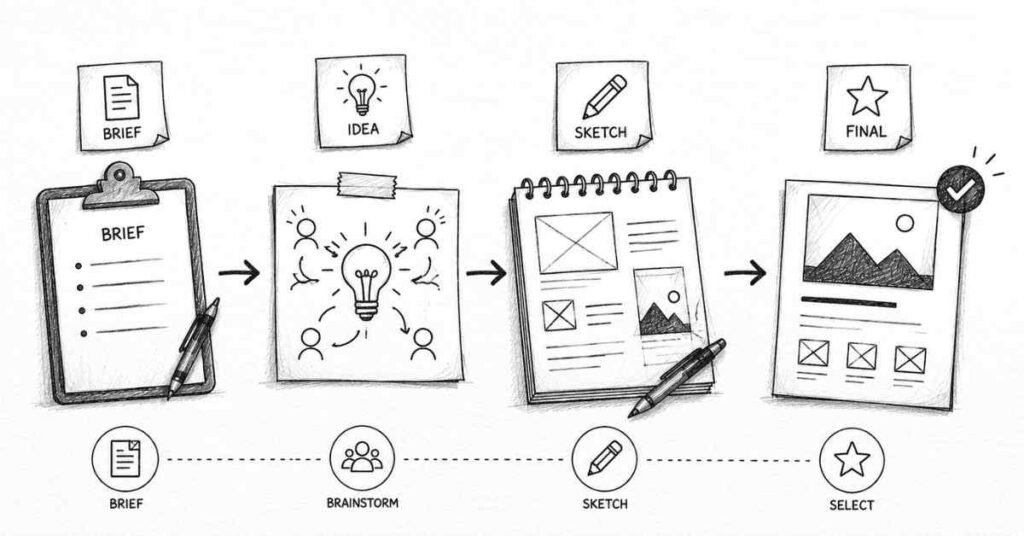
Before you open any software, you need the ability to think visually. This means:
- Understanding a brief and converting words into images.
- Brainstorming multiple ideas instead of jumping to the first one.
- Sketching rough concepts on paper or a tablet.
- Asking: “What’s the main message?” and “What should the viewer feel or do?”
How to practice:
- Take any common object (like chai, traffic, monsoon) and try to represent it with a simple icon or poster idea.
- For every project, force yourself to sketch at least 3–5 different ideas before choosing one.
2. Typography Basics
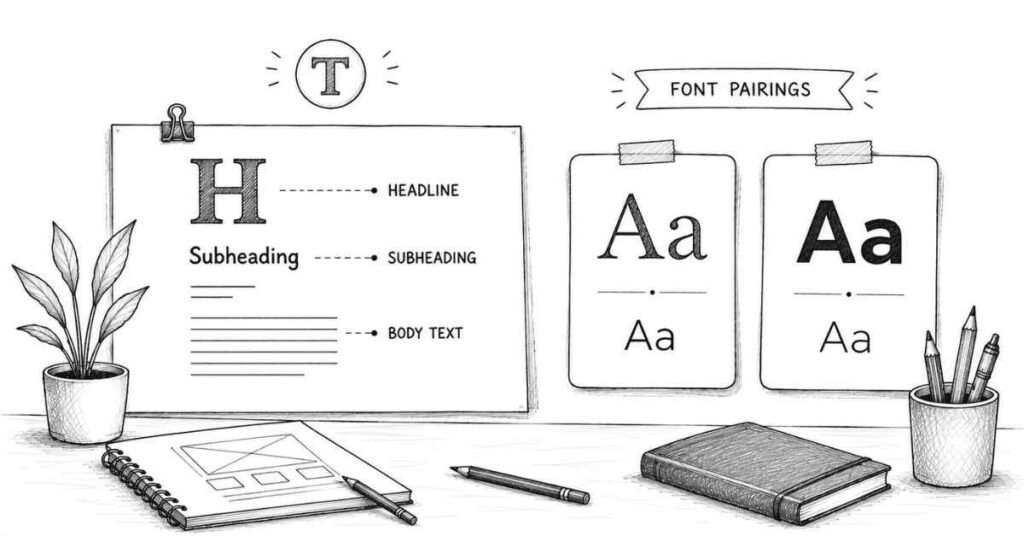
Typography is where many beginners are instantly judged as “pro” or “amateur.” It’s not just about choosing pretty fonts; it’s about readability, hierarchy, and mood.
Key typography skills:
- Choosing the right typeface for the message (formal, playful, modern, traditional).
- Using font sizes to show importance (headline vs subheading vs body text).
- Managing spacing: line spacing, letter spacing, and margins.
- Pairing fonts (usually 2 fonts per project is enough).
Simple rules to start:
- Use no more than 2–3 fonts in one design.
- Make sure body text is easily readable: decent size and good contrast with the background.
Avoid using decorative or script fonts for long paragraphs.
3. Color Theory and Color Psychology
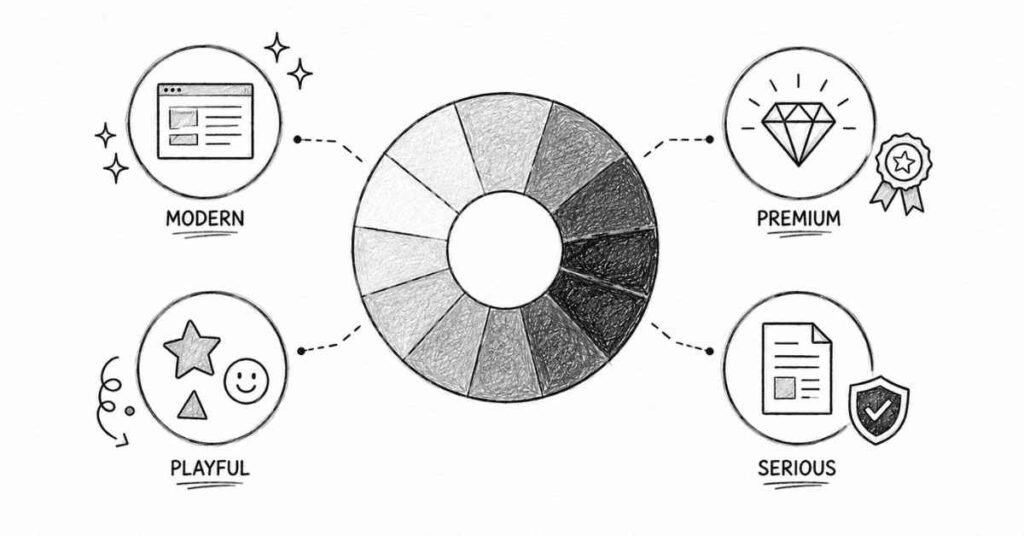
Color is emotional. It can instantly make a design feel modern, traditional, premium, youthful, or serious.
Important concepts:
- Hue (the color itself), saturation (intensity), and value (lightness/darkness).
- Complementary colors (opposites on the color wheel high contrast).
- Analogous colors (neighbors on the color wheel harmonious).
- Warm vs cool colors (and how they affect mood).
In India, context matters. For example:
- Red often suggests festivals, weddings, and energy.
- Saffron can be associated with courage or spiritual themes.
- Green is common in food and nature brands.
- Blue is trusted for tech, finance, and corporate brands.
Practice ideas:
- Pick a brand you like and recreate its color palette.
Create 3 variations of the same poster with different color schemes and notice how the mood changes.
4. Layout, Grids, and Composition
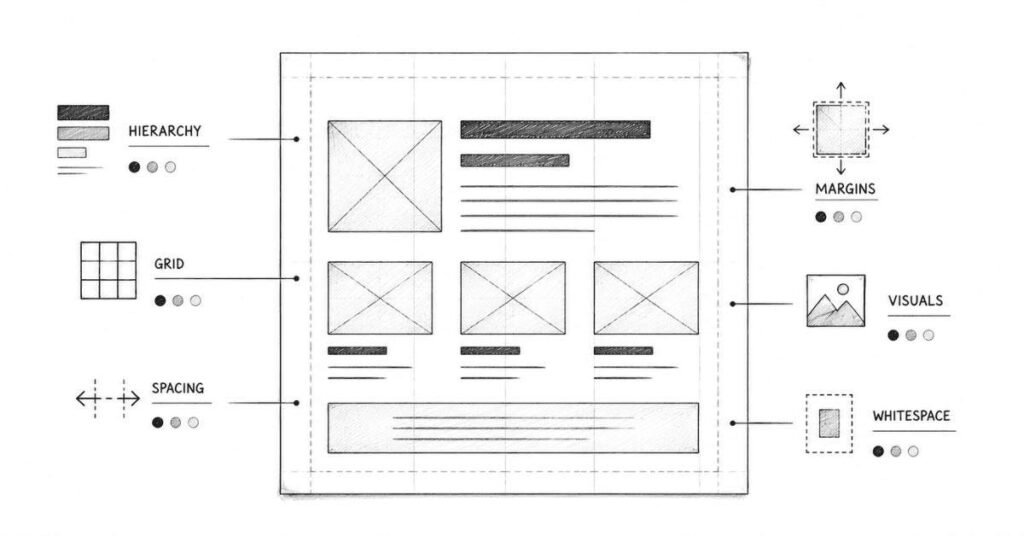
A design can have great colors and fonts but still look “off” if the layout is weak. Layout is how you arrange elements so they feel organized and easy to follow.
Key aspects:
- Using grids (columns and rows) to align elements.
- Creating visual hierarchy: big elements for important information, smaller ones for details.
- Keeping enough white space so the design can “breathe.”
- Guiding the eye from one element to the next.
Beginner tips:
- Always turn on rulers and guides in your design software.
- Align text and images carefully—never “eyeball it.”
Keep margins consistent on all sides.
5. Image Selection and Basic Editing
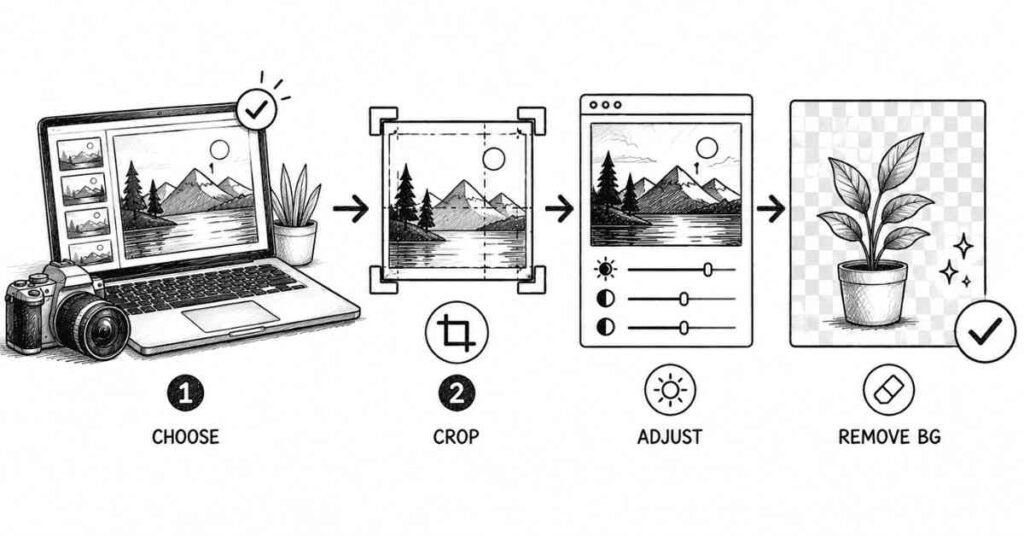
Graphic designers don’t always need to be professional photographers, but they must know how to work with images.
You should know how to:
- Choose high-quality, relevant images that match the message.
- Crop and straighten photos properly.
- Adjust brightness, contrast, and color balance.
- Remove backgrounds for product or profile images.
- Compress images for web without losing too much quality.
Practice idea:
- Take an average-looking photo and try to improve it using basic adjustments.
Remove backgrounds from 10 different images until you can do it cleanly and quickly.
6. Iconography and Basic Illustration
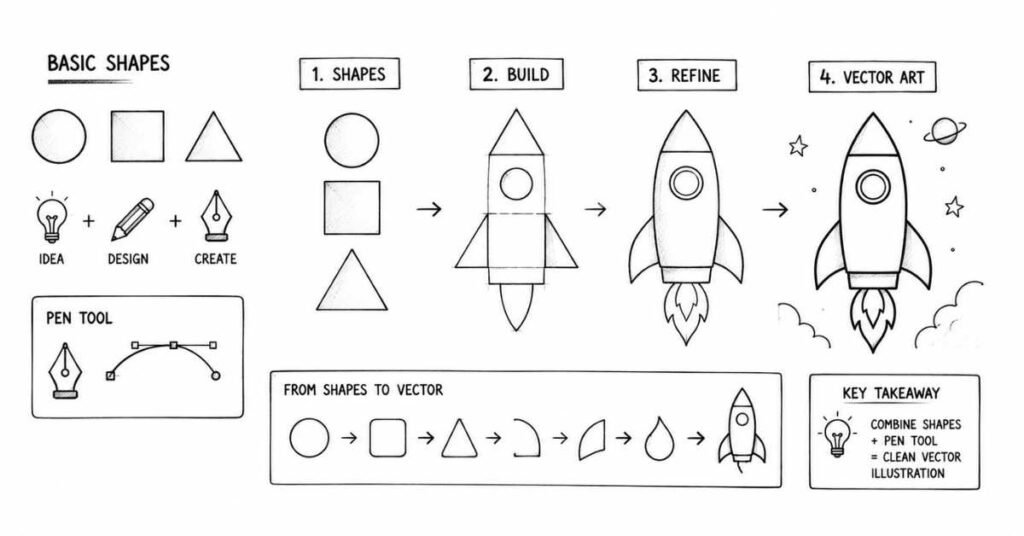
You don’t have to be a full-fledged illustrator, but basic icon and shape creation is extremely useful.
You’ll often create:
- Simple icons for apps, websites, or infographics.
- Basic illustrations to support text.
- Shape-based graphics for presentations and social media posts.
Skills to aim for:
- Using basic shapes (circles, rectangles, triangles) and combining them.
- Using the pen tool to create custom vector shapes.
Keeping icon styles consistent (line thickness, corner radius, color).
7. Understanding Different Media: Print vs Digital
Lorem ipsum dolor sit amet, consectetur adipiscing elit. Ut elit tellus, luctus nec ullamcorper mattis, pulvinar dapibus leo.
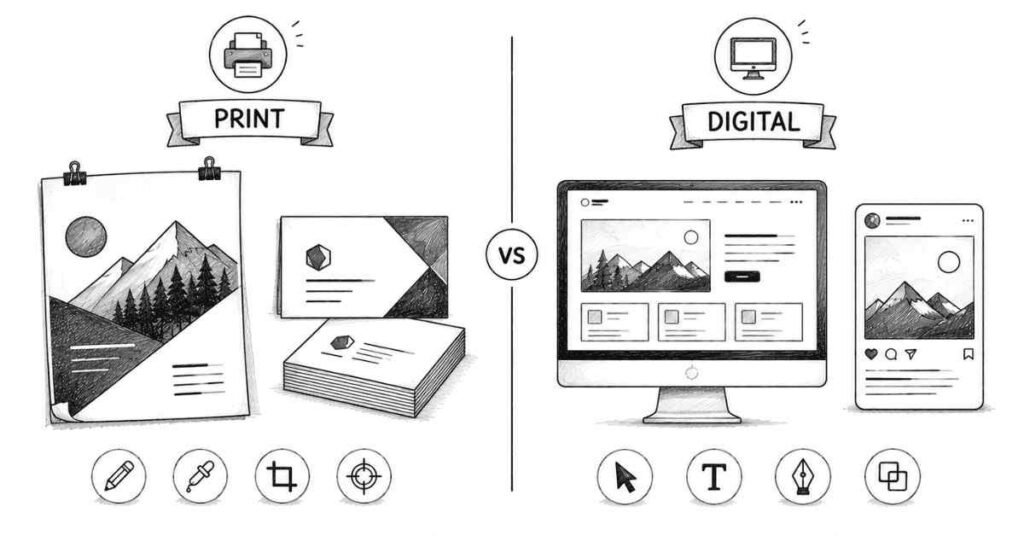
For Digital Designs (Social Media, Websites, Apps)
- lor mode: RGB (optimized for screens).
- Resolution: Usually 72Co–150 DPI, but what matters more is pixel dimensions (e.g., 1080×1080 px for Instagram posts, 1920×1080 px for YouTube thumbnails).
- File formats: JPG or PNG for images, MP4 for videos.
- Focus: Clarity on small screens, quick loading, readable text.
For Print Designs (Posters, Flyers, Visiting Cards)
- Color mode: CMYK (used by printers).
- Resolution: 300 DPI for sharp output.
- Bleed: Extra space beyond the edge (usually 3 mm on each side) to avoid white borders when trimming.
- File formats: Print-ready PDF, high-res JPG or TIFF.
- Focus: Crisp text, correct colors, margins, and safe areas.
If you’re designing a visiting card for a local business in Hyderabad, you’ll design in CMYK at 300 DPI with bleed; if you’re making a story post for Instagram, you’ll design in RGB at 1080×1920 px.
Essential Software Tools and What They’re Best For
You don’t need to master every tool at once. Start with a basic tools and go deeper over time.
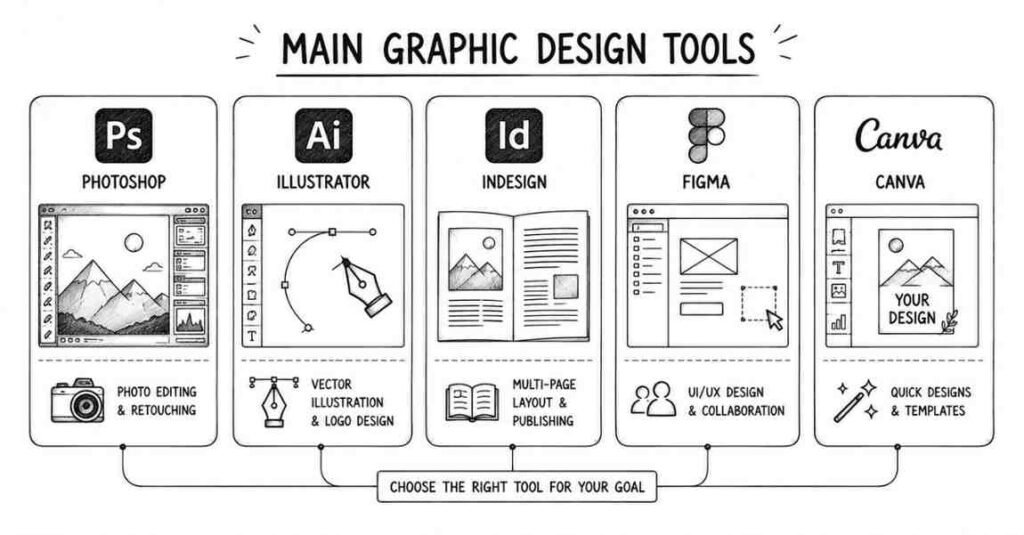
1. Adobe Photoshop – The Image Editing Powerhouse
Best for:
- Social media posts.
- Website banners and thumbnails.
- Photo editing and retouching.
- Digital artwork and composites.
Key beginner skills:
- Layers and masks (the real core of Photoshop).
- Selection tools (lasso, magic wand, object selection).
- Adjustment layers (brightness/contrast, curves, color balance).
- Basic text handling and blending modes.
- Exporting for web and print.
Example use case for an Indian designer:
- Editing product photos for a local boutique.
- Creating festive campaign posts (Diwali, Holi, Eid) for a brand.
- Making YouTube thumbnails for content creators.
2. Adobe Illustrator – For Logos and Vector Graphics
Best for:
- Logos and icons.
- Brand identity design.
- Vector illustrations that must scale to any size.
Key beginner skills:
- Pen tool (core skill for vector work).
- Shape builder tool and Pathfinder.
- Working with strokes, fills, and gradients.
- Creating and editing text for logos and brand marks.
- Exporting vector and raster versions (AI, SVG, PNG, PDF).
Example use cases:
- Designing a logo for a new cafe in your city.
- Creating icon sets for a mobile app.
- Designing simple illustrations for websites and infographics.
3. Adobe InDesign – For Layout and Publications
Best for:
- Brochures, magazines, and reports.
- Multi-page documents like annual reports or catalogs.
- Typesetting-heavy work with lots of text.
Key beginner skills:
- Master pages (for repeated elements like headers/footers).
- Text frames, columns, and paragraph styles.
- Image placement and wrapping.
- Exporting print-ready PDFs.
Example use cases:
- A college prospectus booklet.
- An NGO annual report.
- A restaurant menu with multiple sections.
4. Figma / Adobe XD – For UX/UI and Digital Products
Figma and Adobe XD are primarily used for web and app design.
Best for:
- Website UI design.
- Mobile app screens.
- Interactive prototypes.
Key beginner skills:
- Frames (artboards) and layout grids.
- Auto-layout (Figma) for responsive components.
- Components and styles (for reusable buttons, inputs, etc.).
- Creating clickable prototypes for user testing.
Example use cases:
- Designing a mobile app concept for a local service (e.g., tiffin delivery).
- Redesigning the homepage of a college website.
- Creating UI screens for case studies in your portfolio.
5. Canva – For Non-Technical, Fast Output
Canva is especially useful in India for:
- Social media content.
- Posters, invites, and quick marketing creatives.
- People from non-design backgrounds who still need decent visuals.
Best use strategy:
- Use Canva to start understanding layout, color, and typography in a simple environment.
- Later, recreate your Canva layouts in Photoshop/Illustrator to level up your technical skills.
- Use it for speed when budgets or timelines are small.
6. Bonus Tools You’ll Eventually Touch
You don’t need these immediately, but they’ll help as you grow:
- After Effects: Motion graphics and animated posts.
- Premiere Pro / CapCut / DaVinci Resolve: Basic video editing.
- Procreate (iPad): Digital illustration and lettering.
- CorelDRAW: Still used heavily in many Indian print and signage shops.
Mapping Skills to Tools: A Simple Table
Goal / Skill | Primary Tools | Secondary Tools |
Social media posts | Photoshop, Canva | Illustrator |
Logo and brand identity | Illustrator | Photoshop |
Print materials (flyers, brochures) | InDesign, Illustrator | Photoshop |
Photo editing and manipulation | Photoshop | Lightroom |
Web & app UI design | Figma, Adobe XD | Photoshop (for assets) |
Motion graphics | After Effects | Premiere Pro |
Simple icons & illustrations | Illustrator, Figma | Procreate |
How to Build a Learning Path Around These Tools
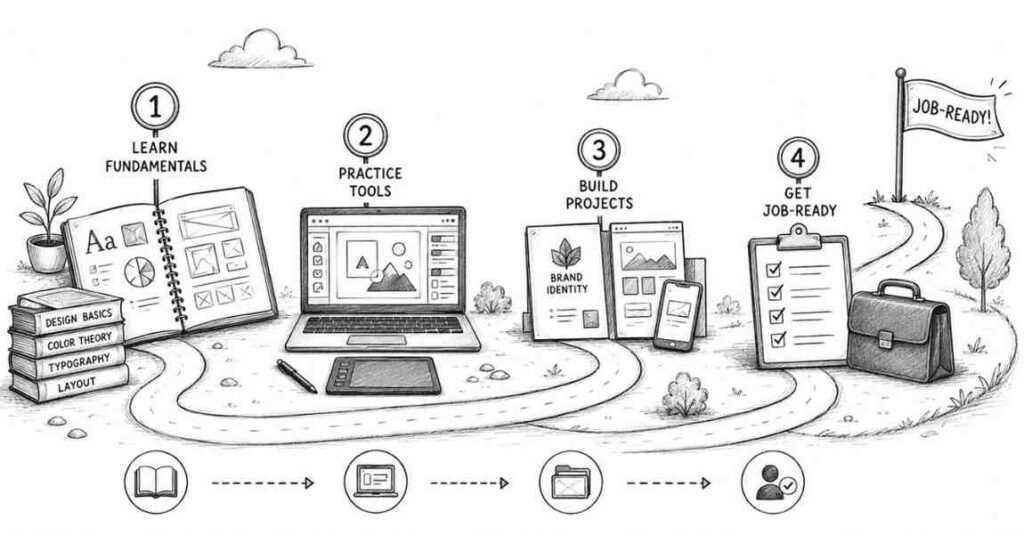
Phase 1 (Month 1): Learn Principles + Easy Tools
- Focus on fundamentals: typography, color, layout, contrast, hierarchy.
- Use Canva and/or Figma to apply these concepts without heavy technical friction.
- Complete small projects: Instagram posts, simple posters, story series.
Phase 2 (Months 2–3): Move into Adobe
- Pick ONE main Adobe tool based on your interest:
- Photoshop → social media, photo-based design.
- Illustrator → logos and vector work.
- Figma/Adobe XD → UX/UI.
- Follow a structured beginner playlist or mini-course, not random videos.
- Recreate 3–5 of your older Canva projects using Adobe software.
Phase 3 (Months 4–6): Combine Skills for Real Projects
- Start taking small freelance or college projects.
- Learn to export correctly for print and digital.
- Build at least 10–15 strong portfolio pieces across different categories.
Practice Framework: Turning Tools into Real Skills
1. Copy to Learn (But Don't Present as Your Own)
Pick a design you admire (poster, social post, login screen) and try to replicate it as closely as possible—only for practice.
Why this works:
- You’ll discover techniques you didn’t know (how did they create that effect?).
- You’ll learn tool shortcuts and workflows by reverse-engineering.
- You’ll understand why certain design decisions were made.
Important: These copies are for learning only. Never put them in your portfolio or claim them as original work. Once you understand the technique, apply it to your own original projects.
Weekly practice suggestion:
- Pick 2 designs every week from Behance or Dribbble.
- Spend 30–60 minutes replicating each one.
- Write down what you learned (new tool, new technique, design insight).
2. 30-Day Design Challenges
Set yourself monthly challenges to build consistency and push your skills.
Examples:
- 30 Days of Logos: Design one logo concept daily (fictional brands, redesigns, abstract marks).
- Poster a Day: Create one poster for imaginary events, movies, or causes.
- Daily UI Challenge: Design app screens following prompts (sign-up page, settings, checkout).
- Typographic Exploration: Create text-based designs focusing purely on typography.
Why this works:
- Forces you to practice daily (consistency beats intensity).
- Builds a portfolio quickly.
- Helps you discover what you enjoy most.
- Teaches you to create under time constraints (a crucial professional skill).
How to stay accountable:
- Share your work on Instagram or LinkedIn with hashtags (#30daychallenge, #dailydesign).
- Join communities doing the same challenge.
- Don’t aim for perfection—aim for completion.
3. Real-World Redesign Projects
Find designs around you that could be better and redesign them.
Project ideas specific to India:
- Redesign a local restaurant’s menu that’s cluttered or hard to read.
- Improve a neighborhood shop’s signboard.
- Redesign your college fest poster.
- Create a better interface for a government website that’s confusing.
- Improve packaging for a local brand you use.
Process to follow:
- Document the original (photo or screenshot).
- List what doesn’t work (poor readability, bad colors, no hierarchy, etc.).
- Sketch 2–3 different solutions on paper.
- Create your redesigned version digitally.
- Present both versions with explanations.
Portfolio value: Redesign case studies are gold. They show you can identify problems and solve them—exactly what clients and employers want.
4. Skill-Specific Drills
Instead of always making complete designs, sometimes isolate one skill and drill it.
Typography drills:
- Take the same text (“Fresh Coffee Daily”) and design it 10 different ways using only typography (no images).
- Practice kerning by adjusting letter spacing in logos until it feels perfect.
- Study great typography from design books or Behance and identify what makes it work.
Color drills:
- Take one design and create 5 versions with different color schemes (warm, cool, monochrome, high contrast, pastel).
- Build 20 color palettes from photos you take around your city.
- Practice color harmony using Adobe Color or Coolors.
Layout drills:
- Take the same content (heading, paragraph, image) and create 10 different layouts.
- Practice grid systems: 2-column, 3-column, 6-column.
- Study magazine layouts and analyze their grid structures.
Tool-specific drills:
- Photoshop: Remove backgrounds from 20 different images.
- Illustrator: Create 15 different logo concepts using only geometric shapes.
- Figma: Build a complete component library for a fictional app.
Adobe Creative Cloud: What Indian Students Should Know
Pricing and Student Discounts
Adobe Creative Cloud can seem expensive, but student discounts make it more accessible.
Current pricing in India (as of January 2026):
- All Apps plan (regular): ₹4,331/month.
- All Apps plan (students): Around ₹1,699/month (approximately 60% off).
- Single app: ₹1,675/month.
How to get student discount:
- Verify through your college email address (.edu or .ac.in domains).
- Provide proof of enrollment (student ID card, enrollment letter).
- The discount typically lasts for one year, renewable while you’re still a student.
Is it worth it?
- If you’re serious about professional design: Yes, absolutely.
- If you’re just exploring: Start with free tools (Figma, Canva, trial versions) first.
- For freelancers: Factor this as a business expense—one client project can cover months of subscription.
Free Alternatives If Budget Is Tight
For Photo Editing (Photoshop alternative):
- GIMP: Free, open-source, powerful but steeper learning curve.
- Photopea: Browser-based, Photoshop-like interface, completely free.
- Pixlr: Simpler, good for basic editing.
For Vector Graphics (Illustrator alternative):
- Inkscape: Free, open-source vector editor.
- Vectr: Browser-based, simpler interface.
- Gravit Designer: Free with some premium features.
For UI/UX (Figma/XD alternative):
- Figma: Actually free for individuals (up to 3 projects).
- Penpot: Open-source design tool similar to Figma.
Reality check: While alternatives exist, most Indian design studios and companies use Adobe. Learning Adobe tools improves your employability. Start with alternatives if needed, but plan to transition to Adobe as you grow professionally.
Building Tool Proficiency: A 12-Week Roadmap
Here’s a practical, focused approach for Indian students or career switchers.
Weeks 1–2: Photoshop Basics
Daily commitment: 1 hour
Focus areas:
- Interface navigation and workspace setup.
- Layers, masks, and selections.
- Basic adjustments (brightness, contrast, color balance).
- Text tools and layer styles.
- Exporting for web (JPG, PNG).
Practice projects:
- Create 5 social media posts (Instagram, Facebook).
- Edit 10 photos (improve lighting, remove backgrounds).
- Design 3 YouTube thumbnails.
Resources:
- Adobe’s official Photoshop tutorials.
- YouTube: “Photoshop for beginners 2026” full courses.
- Follow along projects, don’t just watch.
Weeks 3–4: Illustrator Fundamentals
Daily commitment: 1 hour
Focus areas:
- Understanding vectors vs rasters.
- Pen tool mastery (this takes practice—be patient).
- Shape builder and Pathfinder.
- Working with strokes and fills.
- Typography in Illustrator.
- Exporting vectors (AI, SVG, PDF).
Practice projects:
- Create 10 simple logo concepts.
- Design an icon set (8–10 icons with consistent style).
- Create a simple illustration using basic shapes.
Resources:
- Adobe Illustrator official tutorials.
- YouTube channels: Satori Graphics, Logo Design Love.
- Practice pen tool daily for 15 minutes (pen tool exercises).
Weeks 5–6: Combining Photoshop + Illustrator
Daily commitment: 1.5 hours
Focus areas:
- When to use which tool.
- Moving assets between programs.
- Creating complete brand materials (logo in Illustrator, mockups in Photoshop).
- Print-ready file preparation.
Practice projects:
- Complete brand identity: logo, business card, letterhead, social media template.
- Create a poster combining vector graphics and photos.
- Design packaging mockup.
Weeks 7–8: Figma/Adobe XD for UI Design
Daily commitment: 1 hour
Focus areas:
- Frames and components.
- Auto-layout and constraints.
- Typography and color styles.
- Creating interactive prototypes.
- Exporting assets for developers.
Practice projects:
- Design a login/signup screen.
- Create a mobile app concept (5–7 screens).
- Design a landing page.
Resources:
- Figma’s official YouTube channel (excellent tutorials).
- Daily UI challenge prompts.
Weeks 9–10: InDesign for Print Materials
Daily commitment: 45 minutes
Focus areas:
- Document setup with bleed and margins.
- Master pages and paragraph styles.
- Text threading across pages.
- Image placement and wrapping.
- Exporting print-ready PDFs.
Practice projects:
- 4-page brochure.
- 8-page magazine layout.
- Restaurant menu with multiple sections.
Weeks 11–12: Portfolio Building
Daily commitment: 2 hours
Focus areas:
- Selecting your best 10–15 pieces.
- Creating case studies (problem, process, solution).
- Building portfolio website or polished Behance profile.
- Getting feedback and iterating.
Deliverable: Complete, professional portfolio ready to show clients or employers.
Keyboard Shortcuts: Work Faster, Look Professional
Professionals use keyboard shortcuts constantly. Here are the essentials you should memorize across Adobe tools.
Universal Shortcuts (Work in Most Adobe Apps)
Shortcut | Action |
|---|---|
Ctrl + N | New document |
Ctrl + O | Open file |
Ctrl + S | Save |
Ctrl + Shift + S | Save As |
Ctrl + Z | Undo |
Ctrl + Shift + Z | Redo |
Ctrl + C | Copy |
Ctrl + V | Paste |
Ctrl + T | Transform (scale, rotate) |
Ctrl + G | Group layers/objects |
Ctrl + Shift + G | Ungroup |
Spacebar (hold) | Hand tool (pan around canvas) |
Ctrl + 0 | Fit canvas to screen |
Ctrl + + | Zoom in |
Ctrl + – | Zoom out |
Photoshop-Specific
Shortcut | Action |
V | Move tool |
W | Magic Wand/Quick Selection |
L | Lasso tool |
B | Brush tool |
E | Eraser |
T | Text tool |
Ctrl + J | Duplicate layer |
Ctrl + Shift + N | New layer |
Ctrl + E | Merge layers |
Ctrl + Shift + Alt + E | Merge visible to new layer |
[ / ] | Decrease/increase brush size |
Illustrator-Specific
Shortcut | Action |
V | Selection tool |
A | Direct selection tool |
P | Pen tool |
M | Rectangle tool |
L | Ellipse tool |
Shift + C | Anchor Point tool |
Ctrl + ] | Bring forward |
Ctrl + [ | Send backward |
Ctrl + Shift + ] | Bring to front |
Ctrl + Shift + [ | Send to back |
Pro tip: Print out a shortcut cheat sheet and keep it near your workspace. Force yourself to use shortcuts instead of clicking menus for one week—muscle memory will develop quickly.
Common Technical Questions Indian Students Ask
1. "Which resolution should I use?"
For digital (social media, websites):
- Instagram post: 1080×1080 px (square), 1080×1350 px (portrait)
- Facebook cover: 820×312 px
- YouTube thumbnail: 1280×720 px
- Website banner: 1920×1080 px (common desktop size)
For print:
- Always 300 DPI minimum
- Business card: 3.5×2 inches (89×51 mm) at 300 DPI
- A4 poster: 210×297 mm at 300 DPI
- Large format (banner): Can go down to 150 DPI if viewing distance is far
2. "RGB or CMYK?"
Simple rule:
- Screen = RGB
- Print = CMYK
Why it matters: Colors look different in RGB vs CMYK. That bright blue on your screen might print much duller. Always check with your printer about color profiles.
3. "What file format should I deliver?"
For clients who will edit:
- Photoshop: PSD (layered)
- Illustrator: AI (editable vector)
- InDesign: INDD + package folder
For clients who just need finals:
- Print: High-res PDF (300 DPI, CMYK, with bleed)
- Web: PNG (if transparency needed), JPG (for photos)
- Logo: Both vector (AI, EPS, SVG) and raster (PNG at various sizes)
4. "How do I handle Devanagari/regional language fonts?"
Common challenge: Not all fonts support Indian language scripts properly.
Solutions:
- Use Google Fonts (many support Devanagari, Tamil, Telugu, etc.).
- Test the font with actual text before committing to a design.
- For professional work, purchase licensed fonts that support your required scripts.
- Popular Indian language fonts: Noto Sans, Lohit, Poppins (supports Devanagari).
5. "My file size is too large. How do I reduce it?"
For Photoshop:
- Flatten layers before final export.
- Save for Web (Alt + Shift + Ctrl + S) with optimized settings.
- Reduce image dimensions if they’re larger than needed.
For PDFs:
- Use “Smallest File Size” preset when exporting.
- Compress images within the PDF.
For websites:
- Use tools like TinyPNG or Squoosh to compress further.
- Aim for under 200 KB for web graphics.
The Reality of Tool Mastery: How Long Does It Actually Take?
Let’s be honest about timelines.
Basic competency (can complete simple projects):
- 1–2 months of consistent daily practice (1–2 hours).
Professional proficiency (can take paying clients):
- 4–6 months of regular use with real projects.
Expert level (fast, efficient, know advanced techniques):
- 1–2 years of professional work.
Key insight: You don’t need to be an expert to start earning. You need to be good enough to deliver what clients need. A local boutique needs decent social media posts, not award-winning advertising campaigns. Start with projects that match your current skill level and grow from there.
Building a Learning Habit That Sticks
The 20-Minute Rule
The 20-Minute Rule
If 1–2 hours daily feels overwhelming, start with just 20 minutes of focused practice.
Why this works:
- Low commitment removes resistance.
- You can do 20 minutes even on busy days.
- Once you start, you often continue beyond 20 minutes.
- Consistency beats intensity in skill-building.
What 20 minutes looks like:
- One YouTube tutorial + follow-along practice.
- Recreating one design element you saw.
- Designing one social media post.
- Practicing pen tool or typography.
Active Learning vs Passive Watching
Passive: Watching 10 tutorials without opening your software.
Active: Watching one tutorial, pausing every few minutes to try it yourself.
The brutal truth: You can watch 100 hours of tutorials and still not be able to design. You must create, fail, struggle, and figure things out. That’s where real learning happens.
Get Feedback Early and Often
Where to get feedback:
- Reddit (r/graphic_design, r/design_critiques).
- Behance (post work and engage with community).
- Facebook design groups (search “Graphic Design India”).
- Show friends and family (non-designers give valuable user perspective).
- Find a mentor or senior designer online.
How to ask for feedback:
- Be specific: “Does the hierarchy work?” vs “What do you think?”
- Explain your goals: “This is for young audience, should feel energetic.”
- Accept criticism gracefully—it’s how you improve faster.
Final Thoughts: Skills + Tools = Career Opportunities
Tools are just instruments. Your understanding of design principles, your ability to think visually, and your problem-solving skills make you valuable. But you need technical proficiency to bring those ideas to life professionally.
The good news? Every successful designer you admire was once exactly where you are opening Photoshop for the first time, frustrated by the pen tool, confused about file formats. They became skilled through consistent practice, not overnight talent.
Your Next Steps This Week
- Choose one primary tool based on your interest (Photoshop for social media/photos, Illustrator for logos, Figma for UI).
- Find one structured tutorial series (not random videos—a complete beginner course).
- Complete the first 3 lessons and create practice projects from each.
- Set a daily alarm for your practice time—treat it like a class you can’t skip.
- Join one online community where you’ll share your work weekly.
Within One Month
- Complete a beginner course in your chosen tool.
- Create 15–20 practice pieces.
- Recreate 10 designs you admire (for learning only).
- Start a Behance profile and upload your best 5 pieces.
Within Three Months
- Be comfortable with 2–3 Adobe tools.
- Have 30+ practice pieces created.
- Take your first small freelance project (even if it’s just ₹500).
- Understand when to use which tool for which purpose.
Remember: You don’t need to know everything before you start. You learn by doing. Start today with whatever tool you have access to, create something (even if it’s simple), and build from there.
The designers working at top agencies in Mumbai and Bengaluru today started exactly where you are now. The only difference? They started and stayed consistent.
What will you create today?